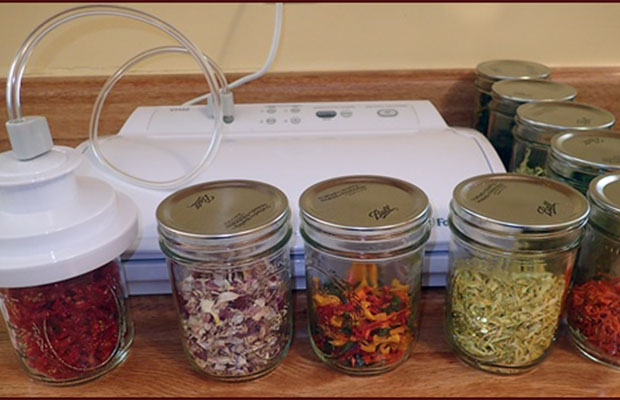
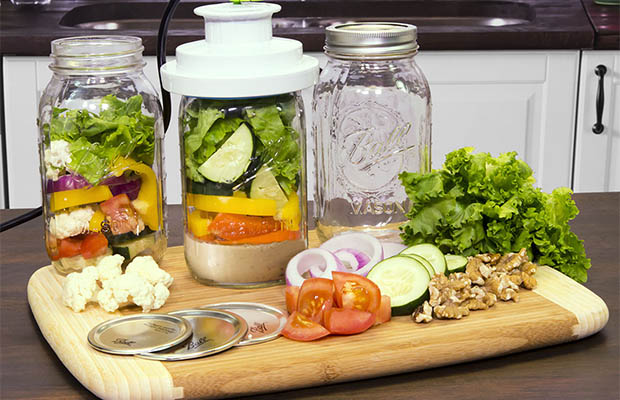
Vacuum seal jars are frequently used in our daily life now.
Let’s get started!
In this article, I’ll demonstrate how to build a super affordable vacuum sealer that you can use to vacuum seal Mason jars. If you’re a prepper, this is a fantastic build!
Table of Contents
What Food Can Be Safely Kept In Vacuum-sealed Jars?
The shelves of your pantry can be vacuum sealed with dry goods, dehydrated foods, freeze-dried foods, spices, and other items.
For instance:
- Dry goods such as rice, flour, pasta
- Dehydrated foods, such as onion slices, peppers, mushrooms, and so on
- Freeze-dried foods – when you open a #10 can, put the bulk of the product in large jars and vacuum-seal, and put a smaller amount in a jar for daily use
- Bulk spices
- Rolled oats for oatmeal
- Powdered milk
- Wheat berries
- Candy – buy candy on clearance after holidays and vacuum seal for later use
Read More: How Long Does Vacuum-sealed Food Last In The Freezer?
What Not To Vacuum Seal?
Avoid vacuum sealing or using oxygen absorbers to keep sugar or brown sugar fresh. The result will be a solid sugar brick that won’t ever release from the jar.
Never vacuum-seal cooked or fresh foods. In other words, vacuum sealing a canning jar of sliced peaches or homemade soup is not safe. These things need to be pressure canned or submerged in water. The food’s shelf life will be extended and it is safe to vacuum seal dry goods like pasta, rice, dehydrated foods, and so on.
For optimum storage life, keep your labeled, vacuum-sealed jars in a cool, dark location.
How To Vacuum Seal Mason Jars?
- Start with a tidy, sterilized jar. You can do this by boiling your jars in a large pot of water for 10 minutes. Before adding dried foods, make sure they are completely dry!). Put your food ingredients in the jar. Approximately half an inch should remain free. If you are planning to freeze your jar, leave at least 1-inch of headspace.
- Adding an oxygen absorber pack to your jar is optional if you’re sealing dried foods. While not necessary, this will aid in absorbing any extra oxygen that might remain after the sealing procedure. Moreover, if your seal ever fails, it will aid in absorbing any moisture.
- Wipe the rim of your Mason jar clean, if needed
- Make sure the Mason jar lid is centered and securely fastened to the jar’s rim.
- In front of the Mason jar, place the jar sealer. It will gently “snap” into place and should fit over the jar securely.
- Connect the accessory cord to the vacuum sealing device’s accessory port. Connect the other end to the jar sealer’s port.
- Lock up your vacuum sealer.
- Press the “Vac/Seal” button on your machine. Your device will start up and start sucking.
- Watch for the lights above the buttons to go out once your machine has finished sucking. The lid sealer can then be removed from your jar by gently pulling up while the machine is unlocked.
- The jar lid should be sealed and you can test the seal by holding the jar by the rim of the lid and making sure that the “button” on the lid is fully depressed. To be safe, I reattach the ring to my vacuum-sealed jars. You never know when the seal might fail.
- To label and date your jar, don’t forget!

Troubleshooting
You may occasionally discover that a jar lid doesn’t seal or that it pops off when you attempt to remove the jar sealer. For some reason, the regular mouth seems to experience this more frequently than the wide mouth. Some things that I’ve found that help with this include:
- Before applying the jar sealer, make sure the jar lid is centered on the jar.
- Don’t wiggle the jar sealer once it is attached; instead, press down firmly in one fluid motion. Once the jar sealer is in place, jiggling it seems to slightly move or loosen the lid, breaking the seal.
- Pull up straight while slowly but firmly removing the jar sealer from your jar. Again, jiggling with the jar sealer sometimes seems to pull the lid off.
- Just give it another shot if all else fails! On the second attempt, I usually get it sealed perfectly!
Why Wouldn’t My Mason Jar Seal Up?
In order for the wide-mouth attachment seen above to function, a seal must be formed by the blue rubber around the ridge at the top of the jar’s bottom (see illustration below). If there are any lumps or other irregularities, it might be unable to form that seal.
The lowest ridge in the picture of the jar has some ripples, if you look at it closely. The average person would never notice this, but I can feel it with my fingers. It appears that this jar will be given a new position that does not involve keeping lettuce in it.
Tips For Getting Lids To Seal On A Mason Jar
1. Is The Flat Lid Bent?
This will occasionally occur because the flat lids can be reused without heat sealing.
2. Does The Jar’s Rim Have A Crack Or A Chip?
If you discover one, this jar won’t seal with a vacuum.
3. If So, Does That Object Prevent A Tight Seal From Forming Between The Lid And The Jar’s Edge?
It’s a simple fix, so I’m hoping this is the issue.
4. Does The Attachment’s Rubber Gasket Have Any Stains?
Wash in soapy water.
5. Which Jar Brand Do You Use?
They fit the wide-mouth attachment, right? Jars from the Ball and Kerr brands are advised by the FoodSaver website. These are not the only ones that work, though. One person conducted research and found that, of the twelve brands she tried, ten were successful and two were not. Therefore, on this one, trial and error might be the way to go.
6. Is Your Jar The Same Mutant As The One I Just Described?
You can use it for other purposes besides vacuum-packing.
7. The Attachment’s Hole Might Be Obstructed By Foreign Objects.
Inspect the top of the attachment where the jar’s air is sucked out. If you are packing something powdery, try cutting a piece of paper the diameter of the jar and laying it on top of the contents to prevent the small particles (such as, powdered sugar or flour) from entering the attachment.
8. If You’re Sealing With A Hand-held Tool, You Might Not Be Pressing Hard Enough Or At The Proper Angle.
The attachment and sealer are supposed to be sealed together. To increase pressure, try pressing harder on the white FoodSaver lid attachment.
95% of the time, changing the angle of approach resolves the issue.
9. Your Hose Might Not Be Completely And Securely Attached If You Are Using A Full-size Foodsaver Machine With A Port.
As much as possible should be inserted into the machine port for the hose. Additionally, check the attachment’s hose to see if it’s safe.
10. Regardless Of The Technique, Are You Running The Machine Long Enough To Remove All The Air?
As the motor slightly slows down, you should notice a difference in its sound. When vacuum-packing with a hand pump, make sure to pump it several times before pumping it once more.

